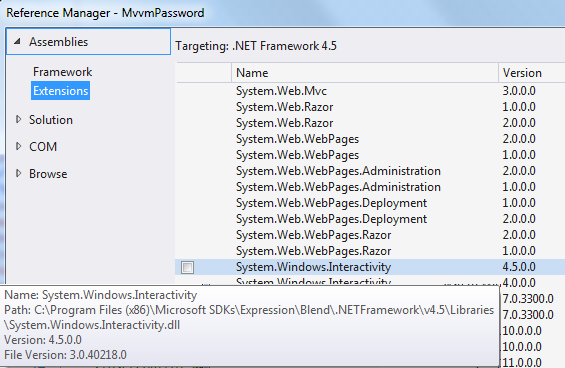
Last time we have seen how to use RelayCommand in ViewModel instead of a click event in View. But what's about all the other events? There is an easy solution where RelayCommand can be used. Therefore we need to add a Reference to the Extension Assembly
System.Windows.Interactivity from
Blend SDK (
for VS2013).

In the
XAML part of the View we need to add the namespace that leads to
System.Windows.Interactivity from
Blend SDK (
for VS2013).
<UserControl x:Class="MvvmPassword.LoginView"
             x:Name="This"
             xmlns="http://schemas.microsoft.com/winfx/2006/xaml/presentation"
             xmlns:x="http://schemas.microsoft.com/winfx/2006/xaml"
             xmlns:i="http://schemas.microsoft.com/expression/2010/interactivity">
Now we can use i:EventTrigger with the property EventName within Interaction.Triggers to define which event should linked to Command. The Command is defined with the property Command within i:InvokeCommandAction.
        <ComboBox x:Name="UserNames"
                  Grid.Row="1"
                  Grid.Column="1"
                  Margin="4"
                  ItemsSource="{Binding UserNames}"
                  DisplayMemberPath="UserName">
            <i:Interaction.Triggers>
                <i:EventTrigger EventName="SelectionChanged">
                    <i:InvokeCommandAction Command="{Binding SelectionCommand}" />
                </i:EventTrigger>
            </i:Interaction.Triggers>
        </ComboBox>
Next we can just use the RelayCommand in ViewModel, as seen in the last post.
SelectionCommand = new RelayCommand(SelectionChanged);
public ICommand SelectionCommand
{
    get;
    private set;
}
private void SelectionChanged(object parameter)
{
    // ...
}
With the ViewModelBase class, the RelayCommand and the EventTrigger our small MVVM Framework can be taken as a good starting point.
Further Posts
- WPF and MVVM - Fundamentals
- WPF and MVVM - Commands
- WPF and MVVM - Events

No comments:
Post a Comment