1. Components
We need
An Arduino Uno R3 board


A MP3 shield
A rotary potentiometer

A turning knob
A toggle switch
A battery holder
A speaker
A protective grille
Some buttons
Some caps
Some resistors
A dot matrix/strip grid board
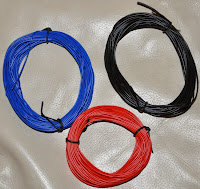
Some wires
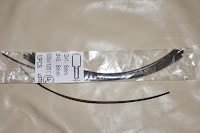
Some shrink tube
Some screws, nuts and spacers/standoffs
2. MP3 Shield
To put the MP3 Shield on the Arduino board, soldering of headers is needed (https://learn.adafruit.com/adafruit-music-maker-shield-vs1053-mp3-wav-wave-ogg-vorbis-player/assembly).
The VS1053 library is downloaded and installed to obtain access to the "MP3 Shield" (https://learn.adafruit.com/adafruit-music-maker-shield-vs1053-mp3-wav-wave-ogg-vorbis-player/installing-software).
With the example sketch "player_simple" the MP3 Shield can be tested. Care must be taken that the "shield-example object" is created instead of the "breakout-example object".
The output of the Serial Monitor shows the success.
3. Buttons and dot matrix/strip grid board
I want to use just one analog pin to recognize which button is pressed. Therefore several resistors are needed. At the push of a button, a parallel circuit emerges, several resistors are skipped and a voltage change occurs. The voltage change can be recognized at the analog pin, the value indicates the button.The voltage values for the 11 buttons are shown here:
According to this table the wire layout is created. The wires are connected with the Arduino board/MP3 shield. Red with the 5V pin to supply the buttons with power, black with GND pin, and white with an analog pin to get the signal of the buttons.
Buttons and resistors will be soldered at the back.
Some wires can be seen at the front.
The arduino board is screwed onto the dot matrix/strip grid board, also the battery holder.
Not only the buttons need a connection to the 5V pin, also the potentiometer needs to be supplied with power. Therefore another wire will be used to tap the 5V power supply.
4. Connecting the other components
The potentiometer has 3 pins. On each pin wires with male connectors are soldered. The left wire (red) is connected to the soldered 5V power supply wire. The middle wire (yellow) is connected to analog pin of the arduino board / mp3 shield. The right wire (black) is connected to a GND pin of the arduino board / mp3 shield.The battery holder is connected to the arduino power jack. The power supply line is cut through to connect the switch button.
Two wires are soldered on the speaker. Then the wires are connected to the MP3 shield.
And so far that is the result
5. Housing
The hardware needs now some housing. Potentiometer and switch button are mounted on the top of the housing. The dot matrix/strip grid board and the speaker with the protective grille are mounted on the front. Through the back the screwed components can be accessed.6. Sketch
The sketch let the potentiometer act as volume control, recognizes the buttons and goes to the start, next, previous, first or last mp3 track or fast-forwards the mp3 track. The current mp3 track will also be remembered, so next time the Audino is switched on the remembered track will be played again.#include <SPI.h> #include <Adafruit_VS1053.h> #include <SD.h> #define SHIELD_CS 7 // VS1053 chip select pin (output) #define SHIELD_DCS 6 // VS1053 Data/command select pin (output) #define DREQ 3 // VS1053 Data request, ideally an Interrupt pin #define CARDCS 4 // Card chip select pin Adafruit_VS1053_FilePlayer musicPlayer = Adafruit_VS1053_FilePlayer(SHIELD_CS, SHIELD_DCS, DREQ, CARDCS); // VS1053 play speed parameter #define para_playSpeed 0x1E04 // constants won't change // the number of the pin that is used for the pushbuttons const int buttonsPin = A0; // the pin of the potentiometer that is used to control the volume const int volumePin = A1; // wait before next click is recognized const int buttonPressedDelay = 1000; // variables will change byte currentFolder = 1; unsigned int currentFile = 0; unsigned int numberOfFiles[] = { 0, 0, 0, 0, 0, 0, 0, 0, 0, 0 }; // the current volume level, set to min at start byte volumeState = 254; // last button that was pressed byte lastPressedButton = 0; // is the last pressed button released boolean released = true; // remember if the back button was pressed last time byte lastReleasedButton = 0; // the time at the back button was pressed last time long lastBackButtonTime = 0; char currentTrackFileName[] = "/0/current.txt"; // the setup routine runs once when you turn the device on or you press reset void setup() { // disable LED L pinMode(13, OUTPUT); digitalWrite(13, LOW); // initialize serial communication at 9600 bits per second //Serial.begin(9600); // initialise the music player if (!musicPlayer.begin()) { //Serial.println("VS1053 not found"); while (1); // don't do anything more } // initialise the SD card SD.begin(CARDCS); // If DREQ is on an interrupt pin (on uno, #2 or #3) we can do background // audio playing musicPlayer.useInterrupt(VS1053_FILEPLAYER_PIN_INT); // DREQ int musicPlayer.sineTest(0x44, 100); // Make a tone to indicate VS1053 is working // read the number of tracks in each folder for (byte i = 0; i < 10; i++) { String temp = "/"; temp.concat(i); char filename[3]; temp.toCharArray(filename, sizeof(filename)); numberOfFiles[i] = countFiles(SD.open(filename)); //Serial.print(filename); //Serial.print(": "); //Serial.println(numberOfFiles[i]); } // read remembered track if (SD.exists(currentTrackFileName)) { File file = SD.open(currentTrackFileName, FILE_READ); if (file) { currentFolder = file.readStringUntil('\n').toInt(); currentFile = file.readStringUntil('\n').toInt() - 1; } file.close(); } delay(100); // init delay } // counts the number of files in directory unsigned int countFiles(File dir) { unsigned int counter = 0; while (true) { File entry = dir.openNextFile(); if (!entry) { // no more files break; } counter++; entry.close(); } dir.close(); return counter; } // the loop routine runs over and over again forever void loop() { // play next song if player stopped if (musicPlayer.stopped()) { playNext(); } // check the volume and set it checkVolume(); // check if a button is pressed and perform some action checkButtons(); delay(1); // delay in between reads for stability } // checks the value of the potentiometer // if it has changed by 2 then set the new volume void checkVolume() { // read the state of the volume potentiometer int read = analogRead(volumePin); // set the range of the volume from max=0 to min=254 // (limit max volume to 20 and min to 60) byte state = map(read, 0, 1023, 20, 60); // recognize state (volume) changes in steps of two if (state < volumeState - 1 || state > volumeState + 1) { // remember the new volume state volumeState = state; // set volume max=0, min=254 musicPlayer.setVolume(volumeState, 254); // print out the state of the volume //Serial.print(volumePin); //Serial.print(" volume "); //Serial.println(volumeState); } } // check if some button is pressed // play first track, if button is not pressed last time // play next track, if a button is pressed again void checkButtons() { // get the pressed button byte pressedButton = getPressedButton(); // if a button is pressed if (pressedButton != 0) { //Serial.print("Taste: "); //Serial.println(pressedButton); // if a track/play list button is pressed if (pressedButton < 10 && released) { musicPlayer.stopPlaying(); if (currentFolder == pressedButton) { playNext(); } else { currentFolder = pressedButton; currentFile = 1; playCurrent(); } } // if a function button is pressed else { if (pressedButton == 10 && released) { musicPlayer.stopPlaying(); long time = millis(); // this is the second press within 1 sec., so we // got to the previous track if (lastReleasedButton == 10 && ((time - lastBackButtonTime) < buttonPressedDelay)) { playPrevious(); } else { playCurrent(); } lastBackButtonTime = time; } else if (pressedButton == 11 && released) { // increase play speed musicPlayer.sciWrite(VS1053_REG_WRAMADDR, para_playSpeed); musicPlayer.sciWrite(VS1053_REG_WRAM, 3); //Serial.println("increase speed"); } } released = false; lastReleasedButton = pressedButton; } else { released = true; // reset play speed if (lastPressedButton == 11) { musicPlayer.sciWrite(VS1053_REG_WRAMADDR, para_playSpeed); musicPlayer.sciWrite(VS1053_REG_WRAM, 1); } } // remember pressed button lastPressedButton = pressedButton; } void playPrevious() { currentFile--; if (currentFile < 1) { currentFile = numberOfFiles[currentFolder]; } playCurrent(); } void playNext() { currentFile++; if (currentFile > numberOfFiles[currentFolder]) { currentFile = 1; } playCurrent(); } void playCurrent() { if (numberOfFiles[currentFolder] > 0) { rememberCurrentTrack(); String temp = "/"; temp.concat(currentFolder); temp.concat("/"); temp.concat(currentFile); temp.concat(".mp3"); char filename[temp.length() + 1]; temp.toCharArray(filename, sizeof(filename)); musicPlayer.startPlayingFile(filename); //Serial.print("Play "); //Serial.println(filename); } } void rememberCurrentTrack() { if (SD.exists(currentTrackFileName)) { SD.remove(currentTrackFileName); } File file = SD.open(currentTrackFileName, FILE_WRITE); if (file) { file.println(currentFolder); file.println(currentFile); } file.close(); } // returns 0 if no button is pressed, // else the number of the pressed button is returned (1 - 11) byte getPressedButton() { int buttonsPinValue = analogRead(buttonsPin); byte pressedButton = 0; if (buttonsPinValue > 823) { // button 6 has a value of about 878 pressedButton = 6; } else if (buttonsPinValue > 725) { // button 5 has a value of about 768 pressedButton = 5; } else if (buttonsPinValue > 649) { // button 4 has a value of about 683 pressedButton = 4; } else if (buttonsPinValue > 586) { // button 3 has a value of about 614 pressedButton = 3; } else if (buttonsPinValue > 535) { // button 2 has a value of about 559 pressedButton = 2; } else if (buttonsPinValue > 492) { // button 1 has a value of about 512 pressedButton = 1; } else if (buttonsPinValue > 450) { // if no button is pressed the value is of about 473 pressedButton = 0; } else if (buttonsPinValue > 400) { // button 8 has a value of about 427 pressedButton = 11; } else if (buttonsPinValue > 340) { // button 10 has a value of about 372 pressedButton = 10; } else if (buttonsPinValue > 267) { // button 9 has a value of about 307 pressedButton = 9; } else if (buttonsPinValue > 178) { // button 8 has a value of about 228 pressedButton = 8; } else if (buttonsPinValue > 0) { // button 7 has a value of about 128 pressedButton = 7; } return pressedButton; }
7. PC-Software
The Audino is now ready for use. On the micro SD card the folders "0", "1", "2", "3", "4", "5", "6", "7", "8", "9" must be created. Several mp3 tracks can be added to the folders 1 - 9. The mp3 tracks in each folder must be numbered consecutively (1.mp3, 2.mp3 ...). Hence just one channel is used the mp3 tracks should be in mono.I created a PC-Software to simplify the copy process. The playlists can be planed and created.

8. Further Readings
In german:- Auswahl der Komponenten
- Das Entwicklungsbrett
- Das erste Einschalten
- Die Entwicklungsumgebung
- Knöpfe (digital)
- Mehrere Knöpfe (digital)
- Mehrere Knöpfe (analog)
- Potentiometer
- Das MP3 Shield
- Auswahl der Komponenten 2
- Auswahl der Komponenten (Zusammenfassung)
- Punkt-Streifenrasterplatine und Knöpfe
- Punkt-Streifenrasterplatine und weitere Komponenten
- Das Gehäuse
- Sketch 1 (setup-Methode)
- Sketch 2 (loop-Methode)
- Sketch 3 (Der komplette Code)
- PC-Software


Good job man
ReplyDeleteThank you so much for taking your time to post these directions. I've been looking everywhere online for something like this, and you're the only one that has the idea that I have in mind. I'm going to attempt to build it for my toddler. I have zero electronics/coding background, and I hope to be able to replicate your process.
ReplyDeleteThank you! Based on your project I've created my own https://photos.app.goo.gl/b8v45ydSS9ScQ3Rq8
ReplyDelete